Saturday, April 12, 2014

More Zentangles: Zentangle Parodies (PICTURE HEAVY POST!)

Three weeks ago I had to take an entire week off of school to take my husband and help him through his first week of chemotherapy.  As of today, he has completed his first three-week cycle and on Monday, begins the second cycle of three...and so far he's doing well.  Students were finishing up their ceramic projects and would be finished while I was gone, so I had to come up with a project that would be easy for a non-art substitute to handle.  I decided on zentangles, so I pulled out my zentangle packet from my elective class and I edited it a little to include a project outline and rubric for this project...something I'd like to call Zentangled Masters Parodies.

Students started the brief unit in the note packet I had left for them by practicing value scales, taking the notes on what all of the parts of a zentangle were, and then had to look through art books to choose a famous artwork to recreate in zentangles.  Essentially, the frame of the zentangle came from the border of the drawing.  The "string" of the zentangle was the drawing of the famous painting itself.  For the most part, the students actually really liked this project.  I have to say that it's a good way to review the elements and principles of art, so I think that I may revamp my first unit packet and take out some of the "boring" "What is Art?" notes and replace them with the zentangle notes.  

In the future, I will use this project to help reiterate to students the principles of art...mostly unity/harmony, variety and movement in their drawings.  Many students noted in their reflections that the zentangles made the original paintings seem more alive and fun.  

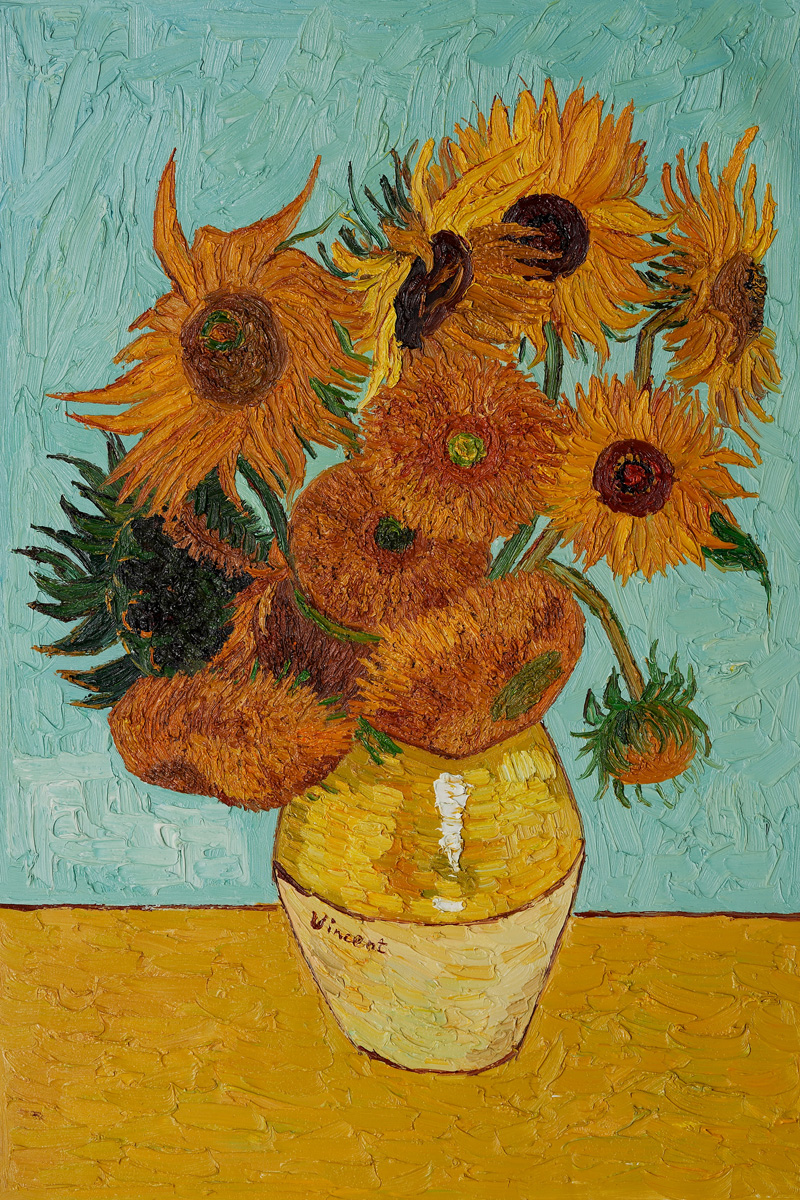
This example is my zentangled parody.


I wish these two students would have incorporated a little more of the original colors into their zentangles.  I do think the one on the left, despite how simple, was pretty successful with their zentangle choices!


This one is amazing!  I really had almost no constructive criticism...and the few points that I was going to point out, the student had already reflected upon in her evaluation of her artwork! 


These two students both used Van Gogh's Bedroom as their inspiration.  I'm not sure why they didn't each use the entire painting in their drawing, but after I came back from being out of school for a week and realized what they had done, I tried to convince them to use similar zentangles and colors in their drawings...but they didn't go for it!

 
And of course, a Kandinsky recreation...

I wanted to also note that I have received a lot of e-mail requests for my zentangle packets and projects.  I have shared my original zentangle packet, the packet I used for this project, and the other two zentangle projects (the found object and the font project), together in one place on the SmARTteacher website.

Monday, April 7, 2014

Studio Art: Coil Pots

This coil pot project was the last project in my Studio Art ceramics unit.  These have finally all been finished up and glazed fired.  For this project, students were required to make a simple vessel.  It did not have to hold liquid.  What they did have to show was movement through the vessel through the use of their coils.  Some did a really awesome job showing movement, while others didn't seem to understand.  Next year, if I repeat this project, I feel I will have to do a better job explaining movement.

Students used plain coils, spiraled coils, braids, and many other coil techniques to create these.
Love this one!  One of the best ones1

The one on the left has an awesome variety of coils!  No so much movement, but definitely creativity in the types of coils that were used.


The brown glaze with the blue specks is amazing on this piece!  I only wish this person would have coordinated the rest of their glaze choices to match that glaze a little better...


After I sit back and review these pieces, I see a need for me to better teach color choice.  As far as I can tell, these students haven't really had much training on color theory.  My current elementary curriculum teaches basic color theory in kindergarten (primary and secondary colors), reviews it in places as they move up, and touches very heavily on it in 5th grade, so hopefully my current students will have a better ability to choose colors as they move up.  As I look forward into next year, I think that I will incorporate a color theory unit early on in the school year, perhaps during my first unit of "What is Art?".

Thursday, April 3, 2014

6th Grade: Ceramic Greek Columns

Here is this year's Ancient Greek projects for my 6th graders.  I did this project two years ago and it was a huge success.  Unfortunately, this year they aren't turning out as great as the first time I did them...and it's through no fault of the students!  It really stinks only having elementary students once every six days!  There is no possible way to keep clay projects wet enough in that 8 day period in between classes (because the weekends add even more time) to allow students two days to work with wet clay. 

All things considering, they did a great job constructing these in a short amount of time, especially since I gave the demo all in the same class!  I tried to cut down on time for them by having slabs pre-rolled using my slab roller instead of having the students roll their own slabs.  Elementary students tend to take a longer time to roll out their own slabs.  Most students also chose to do Ionic and Doric columns...very few Corinthian. 


When I look at the quality of work I was able to get done in the last three years and then compare it to artwork from this year, it makes me a little sad!  If I had my way, I would be 5th-12th grade art so I could really enjoy those students...those are really my favorite grade levels (well, sometimes minus the 7th graders).  My 6th grade curriculum is BY FAR my favorite curriculum...anything that combines art and history makes me giddy with excitement!

I am currently in the process of firing the columns from this year's 6th graders, but I figured that I would share some of the columns from this project when I did it two years ago.  Students had two days to work in wet clay to score and slip, and then a third day to fine tune and smooth out their project.  We then glazed them with clear glaze, and some opted to add a little bit of a green to give it a mossy look.  I will share this years' projects once they are completed!


Wednesday, April 2, 2014

Finished Slump/Hump Mold Projects

Would you believe that we only have two more weeks in our third quarter in my district?!  Where the heck has time gone this year...with everything that has been going on in my life this year, I feel like things have been and are passing in a blur!  Either way, I finally have gotten just about all of our ceramic projects fired in from my ceramics unit in Studio Art.  I have one more firing to go, which I will do tomorrow.  Here are some of our finished slump/hump mold projects we did in Studio Art.  Students were able to choose between glazing, painting with acrylic, or using both to finish their ceramics projects.
I think this mask is my favorite!  The glaze choices were awesome and all around was an all-around excellent job!

This one came in close second...Again, the glaze job on the cards was great and it was an interesting theme choice.  The student glazed everything but the poker chips at the bottom and the money on top.  The rest was painted with acrylic.

Two masks with excellent paint jobs.  These students opted for acrylic paint instead of glaze.

An interesting take on a bowl...loved this one!


This was a very detailed bowl by a student who is very into sports...ah, one place where sports and art got along!


A bit of a creepy mask in my opinion...but interesting none the less, especially that the nose survived!

The following is the rubric I created to grade any finished ceramic project.  I did one grade for the constructed mask itself before it went into the kiln (just in case we had an unexpected explosions) and then I did a grade for the finished product, whether it was glazed, painted or both.